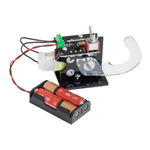
spikenzielabs Useless Machine Build Manual

We recommend reading this guide entirely before you get started.
Tools required:
One phillips screwdriver, and one flat screwdriver, soldering Iron, solder, snips and
supplies to build your own Useless Machine.
Related Manuals for spikenzielabs Useless Machine
Summary of Contents for spikenzielabs Useless Machine
- Page 1 For the best outcome, follow each step in order. We recommend reading this guide entirely before you get started. Tools required: One phillips screwdriver, and one flat screwdriver, soldering Iron, solder, snips and supplies to build your own Useless Machine.
- Page 2 Laser cut acrylic, electronics, hardware parts 2x #4 weld nuts 4x 3/8” 4-40 screws 4x 4-40 nuts Motor mount - wire side Motor mount - Arm side 2x #4 washers 2x 1” 4-40 screws #2 screw and washer #12 washer Switch nut and washer Battery holder.
- Page 3 Assembling the PCB Switch Installation: Make sure that the switch is being installed on the top side of PCB. There is no orientation to the switch. Refer to these photos. Switch Soldering: The switch needs to be standing perfectly vertical on the PCB. We use a ‘Helping Hands’.
- Page 4 Resistor placement and soldering: 2- Flare the legs to hold the resistors in place 3- Solder the 4 legs on the bottom side of the PCB. 4- While wearing safety glasses, 1- Place the resistors in place as the photo above. Trim the excess.
- Page 5 Aligning and soldering the LED: 1- Notice the different lengths of the legs on the LED. Leg #2 is the longest. #1 is the second longest, and #3 is the shortest. The LED gets installed with leg #1 closest to the edge of the PCB.
- Page 6 Placing and installing the snap switch: 1- The snap switch gets installed on the bottom side of the PCB. The hinge side of the snap switch goes on the indicated side on the PCB. 2- Line up the 3 pins with the 3- Press firmly on the snap switch, three holes on the PCB.
- Page 7 Peel the protective film All of the acrylic parts have a cling film that protects the pieces during manufacturing and transport. The film or tape may be blue, brown or white. Start at a corner, and remove the film from both sides of each piece. Ready the motor, motor mount, and fasteners Line up the 2 long screws, 2 small washers, 2 motor mount acrylic pieces, and weld nuts as you see below.
- Page 8 Attaching the motor to the mount Hold the motor with the wires on the Place the arm side motor mount acrylic left and away from you. The ‘nub’ piece over the motor, making sure that facing you. the ‘nub’ fits in the hole in the mount. Place the weld nuts into the holes on the arm side of motor mount.
- Page 9 Place a washer on each While holding the weld nuts in place, slide both screws of the long screws through the washers, motor mount, motor and screw into the weld nut. For the moment, leave the screws loose enough so that the motor mount plastic can wiggle a little. With the screws a little loose, press Keeping the bottoms of the motor down against a flat surface, so that.
- Page 10 Attaching the PCB assembly Take the PCB that you’ve previously Place the PCB assembly over the assembled. motor assembly. Note how the acrylic tabs fit through the holes in the PCB. 3/8” 4-40 screws You will be using these nuts and screws to hold 4-40 nuts secure the PCB to the motor mount.
- Page 11 In the same way, slide in the other nut, on the other side, and attach the other screw. In order to attach the arm, the motor spindle should be in the 12 o’clock position (or close to it). Check yours. ✔.
- Page 12 Adjusting the motor shaft position Skip this step if your motor shaft is already in a 12 o’clock position - from the previous step Do not try to twist the motor spindle by hand, or using the arm. We will show you how to use the battery pack to rotate the motor.
- Page 13 Place the large washer over the motor spindle. The large washer in place. Note: The washer and arm get attached to the LED / Switch side. Align the arm piece so that the laser cut hole will fit the motor spindle. Press the arm over the spindle until the top of the spindle and the arm plastic are flush.
- Page 14 Put the #2 washer on Using a screwdriver, screw in the screw and washer to the #2 screw. secure the arm. Installing completed motor assembly Next, we will be attaching the base. Set up the bottom panel, and the motor assembly in this orientation in front of you.
- Page 15 3/8” 4-40 screws You will be using these nuts and screws to hold secure 4-40 nuts the motor mount assembly to the bottom plate. Slide the screw through the base, and Tighten with a screwdriver, do not over side the nut in so it rests in the slot. tighten.
- Page 16 Attaching the wires To attach the wires, you will need a The red wire from the battery pack goes small flat blade screwdriver. Start by to the +RED screw terminal. Screw both sliding the black wire from the battery in place. pack in to the screw terminal marked -BLACK on the PCB.

